Step-by-step instructions to connect your ad platforms for automated reporting. We only request read permissions—we cannot modify your data.
Link your Shopify store to enable sales and product reporting.
5-10 minutesLink your ad accounts for campaign performance data.
10-15 minutesAdd our bot to receive daily reports and alerts in Slack.
5-10 minutesCreate a custom app that allows us to read your store data for automated reporting.
Creates a custom Shopify app with READ-only permissions. We can view products, orders, and customers—but we cannot modify anything in your store.
https://[your-store].myshopify.com/adminGoodHelp Reporting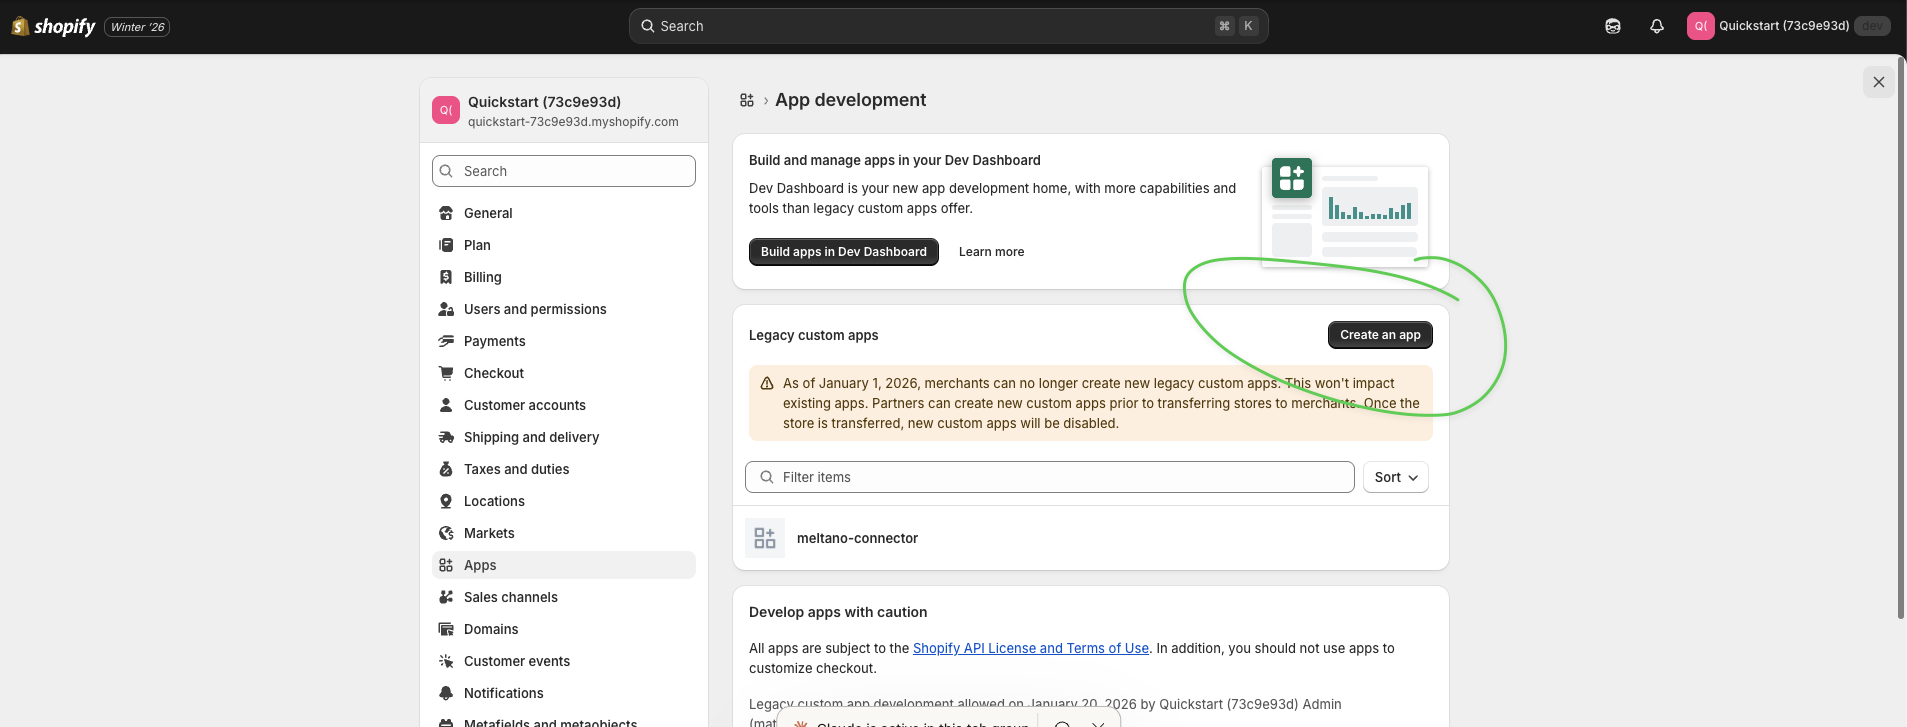
read_ordersread_productsread_customers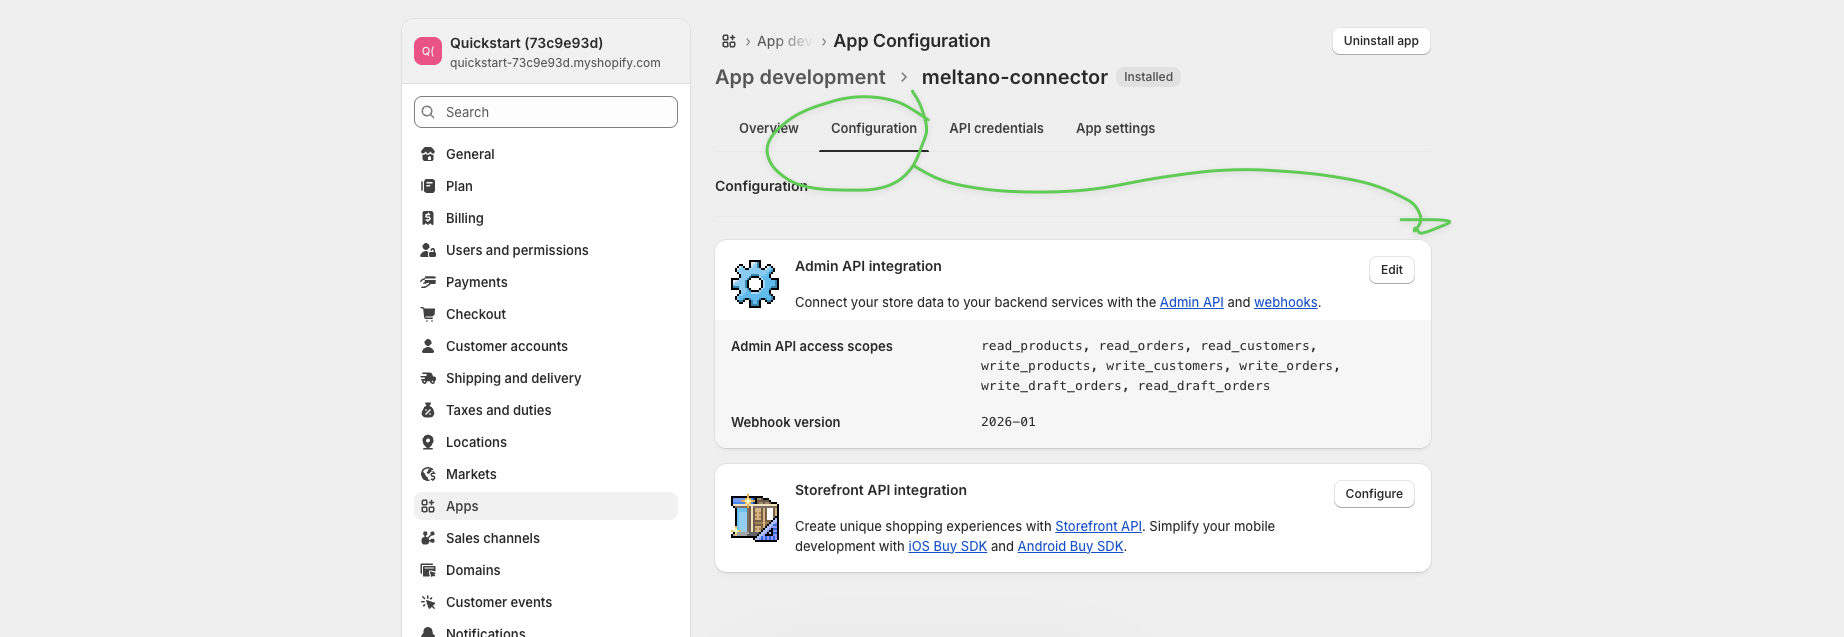
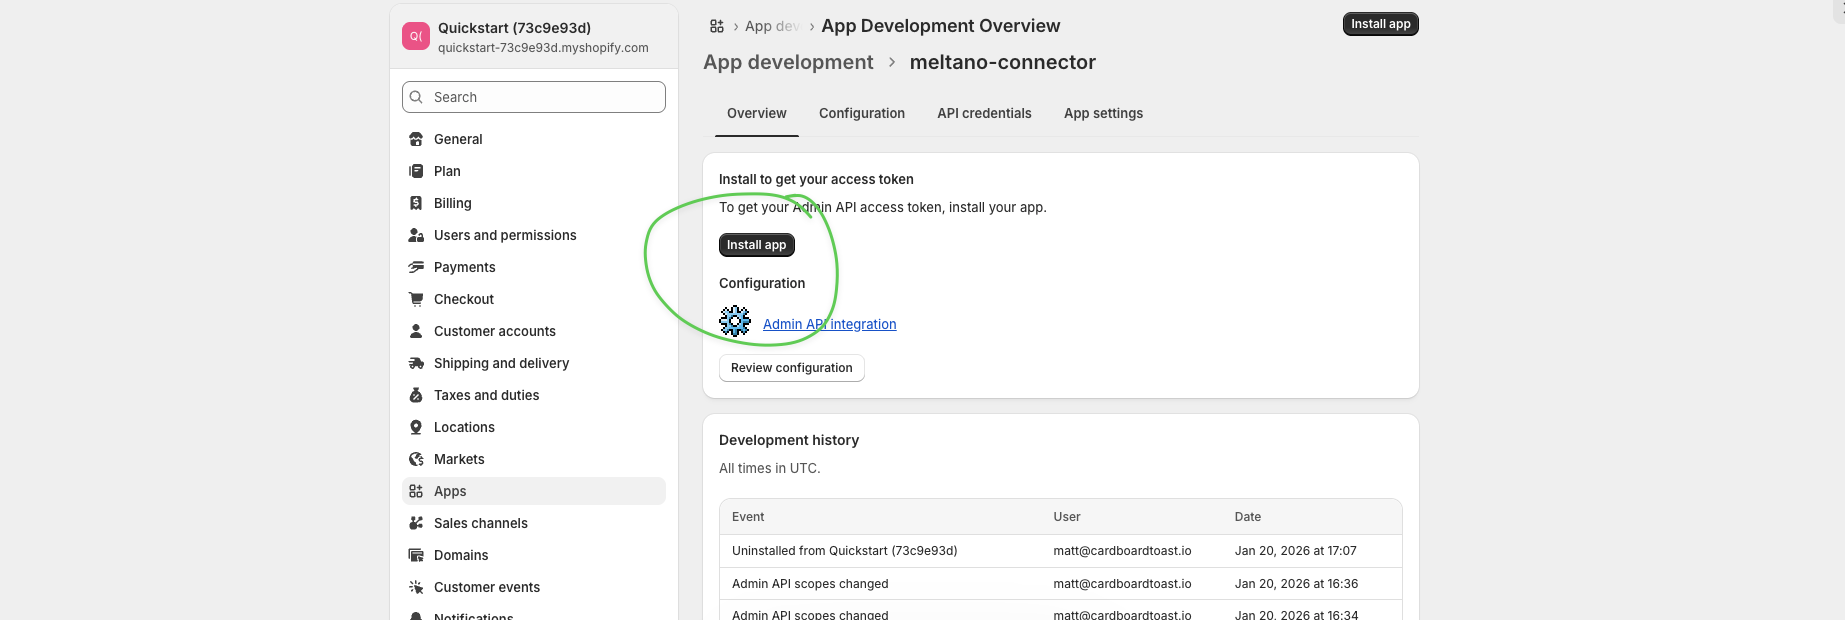
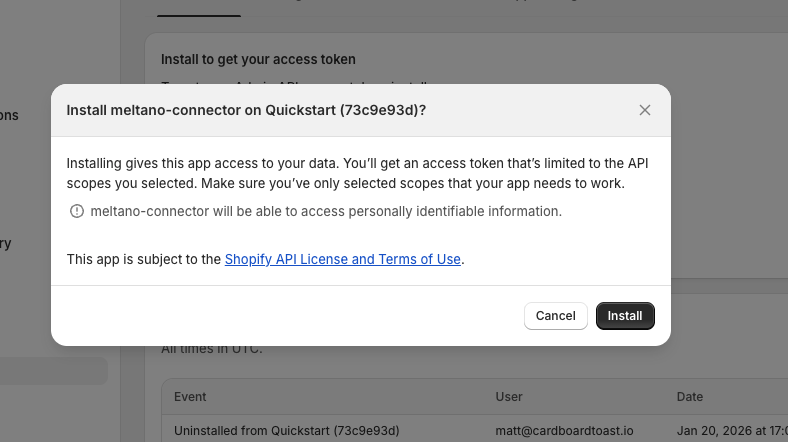
The token is only shown ONCE. Have a secure place ready to paste it before clicking reveal.

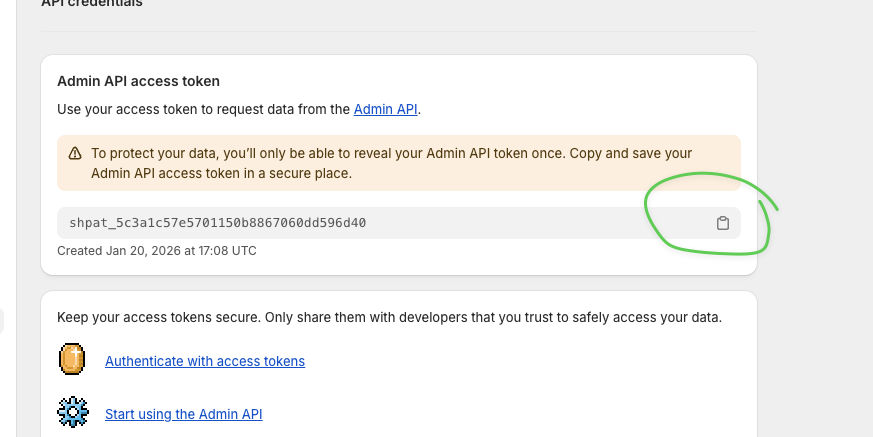
If you forgot to copy it, you'll need to uninstall and reinstall the app to generate a new one.
| What We Need | Where to Find It | Example |
|---|---|---|
| Store URL | Your browser URL bar | my-store.myshopify.com |
| Access Token | From Step 4 above | shpat_5c3a1c57e5701... |
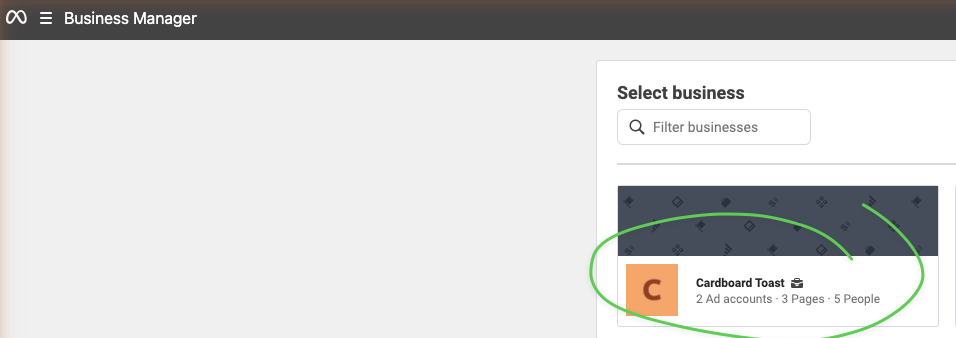
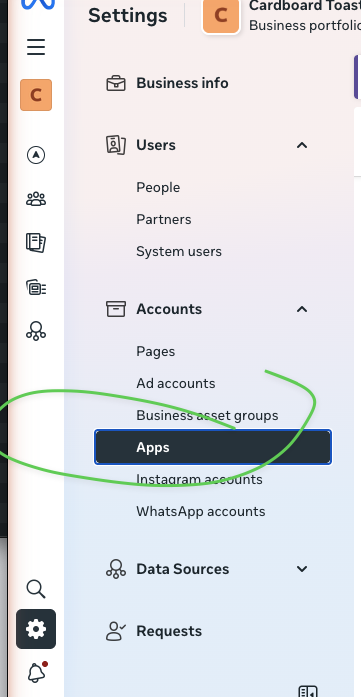
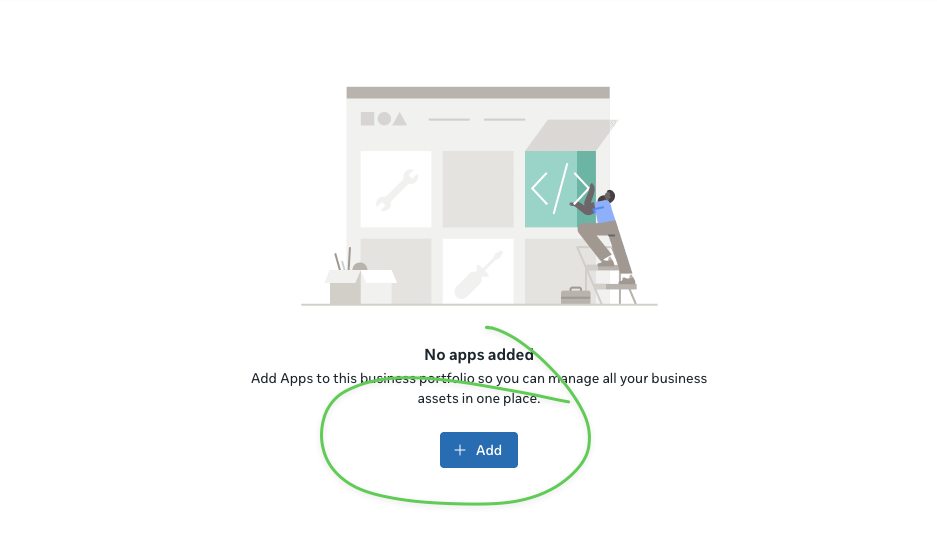
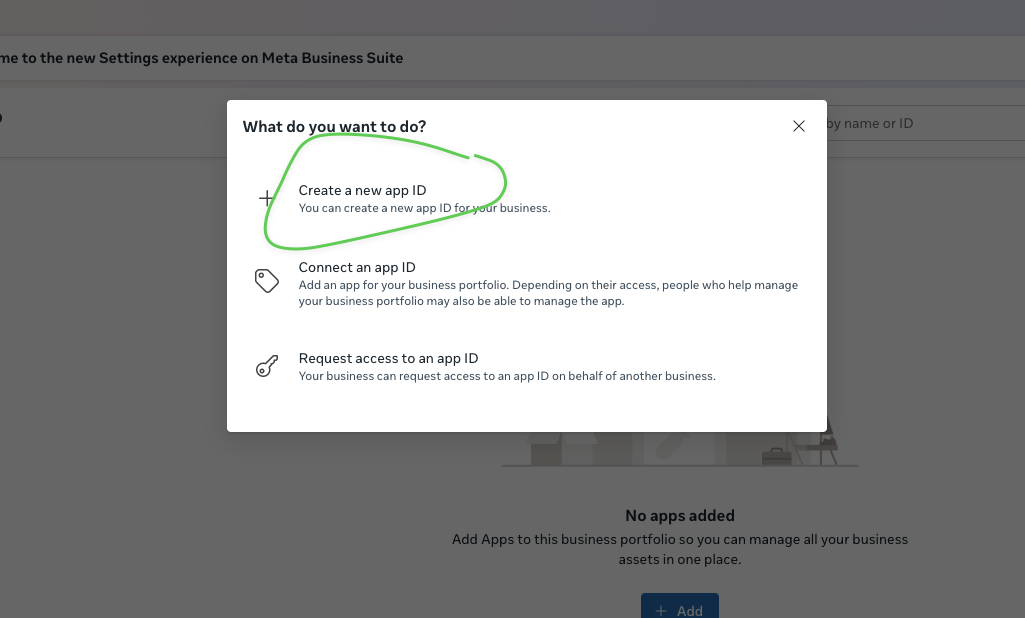
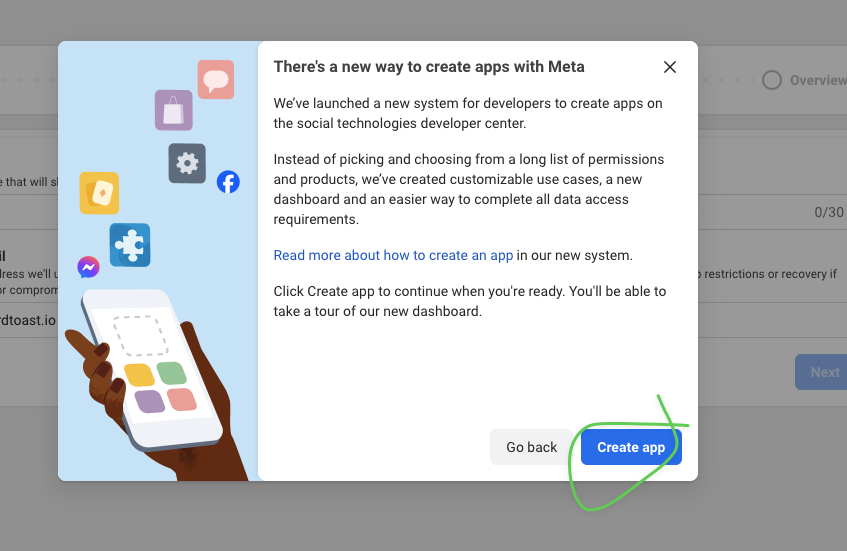
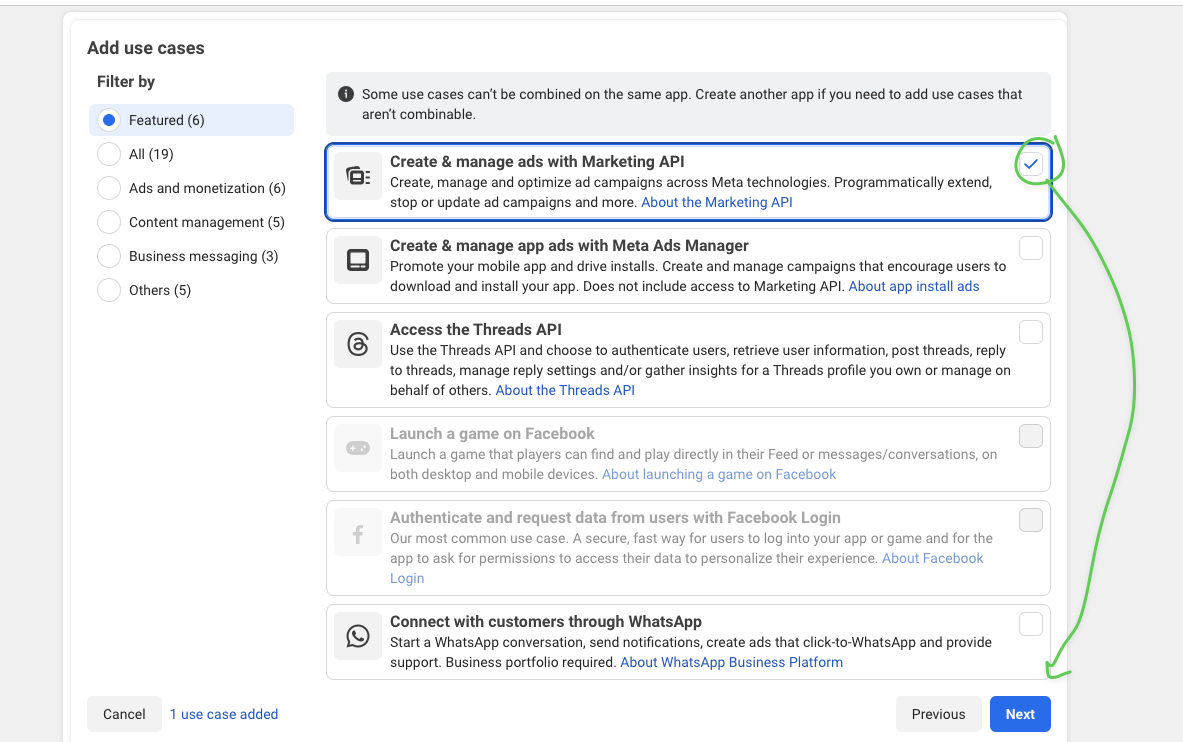
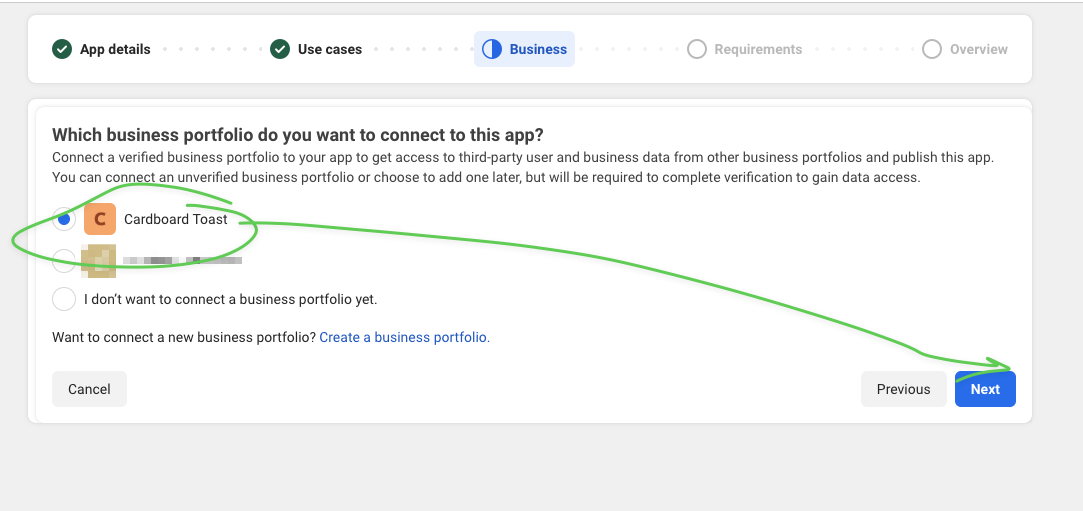
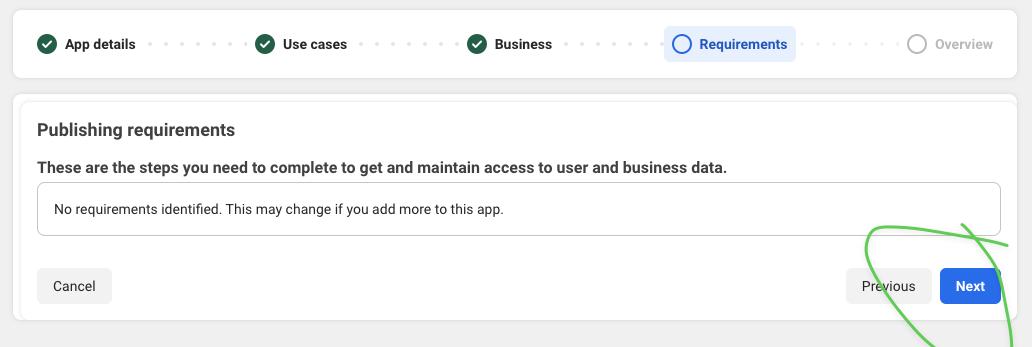
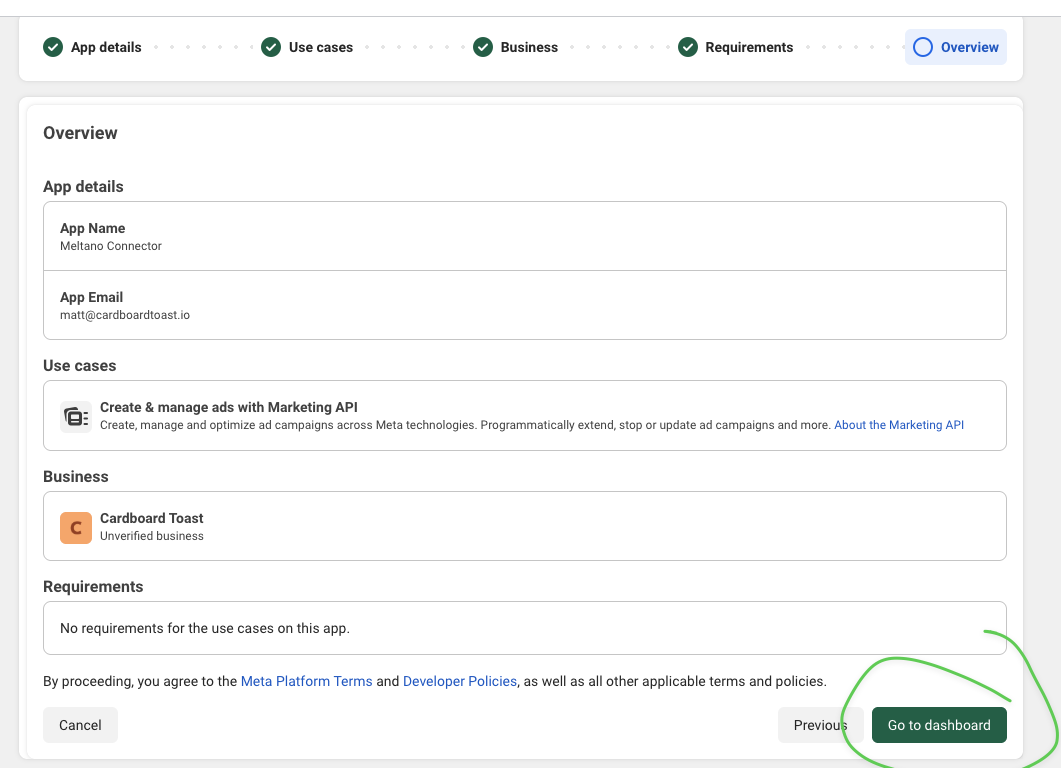
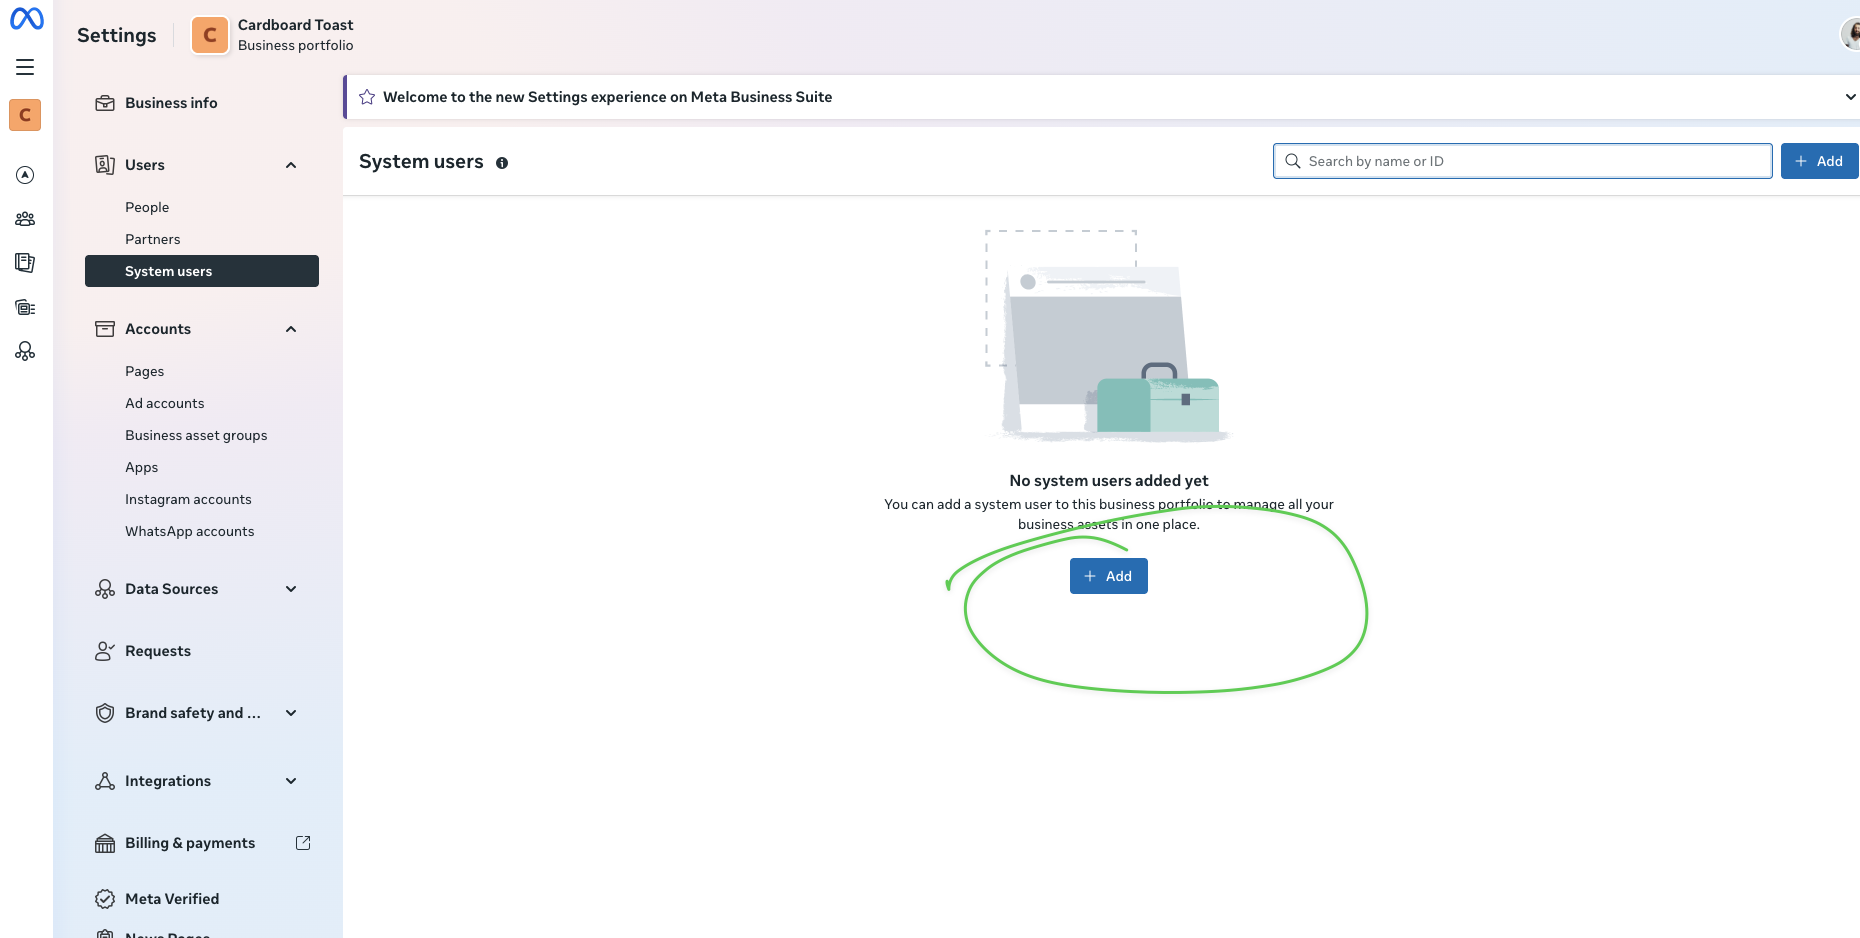
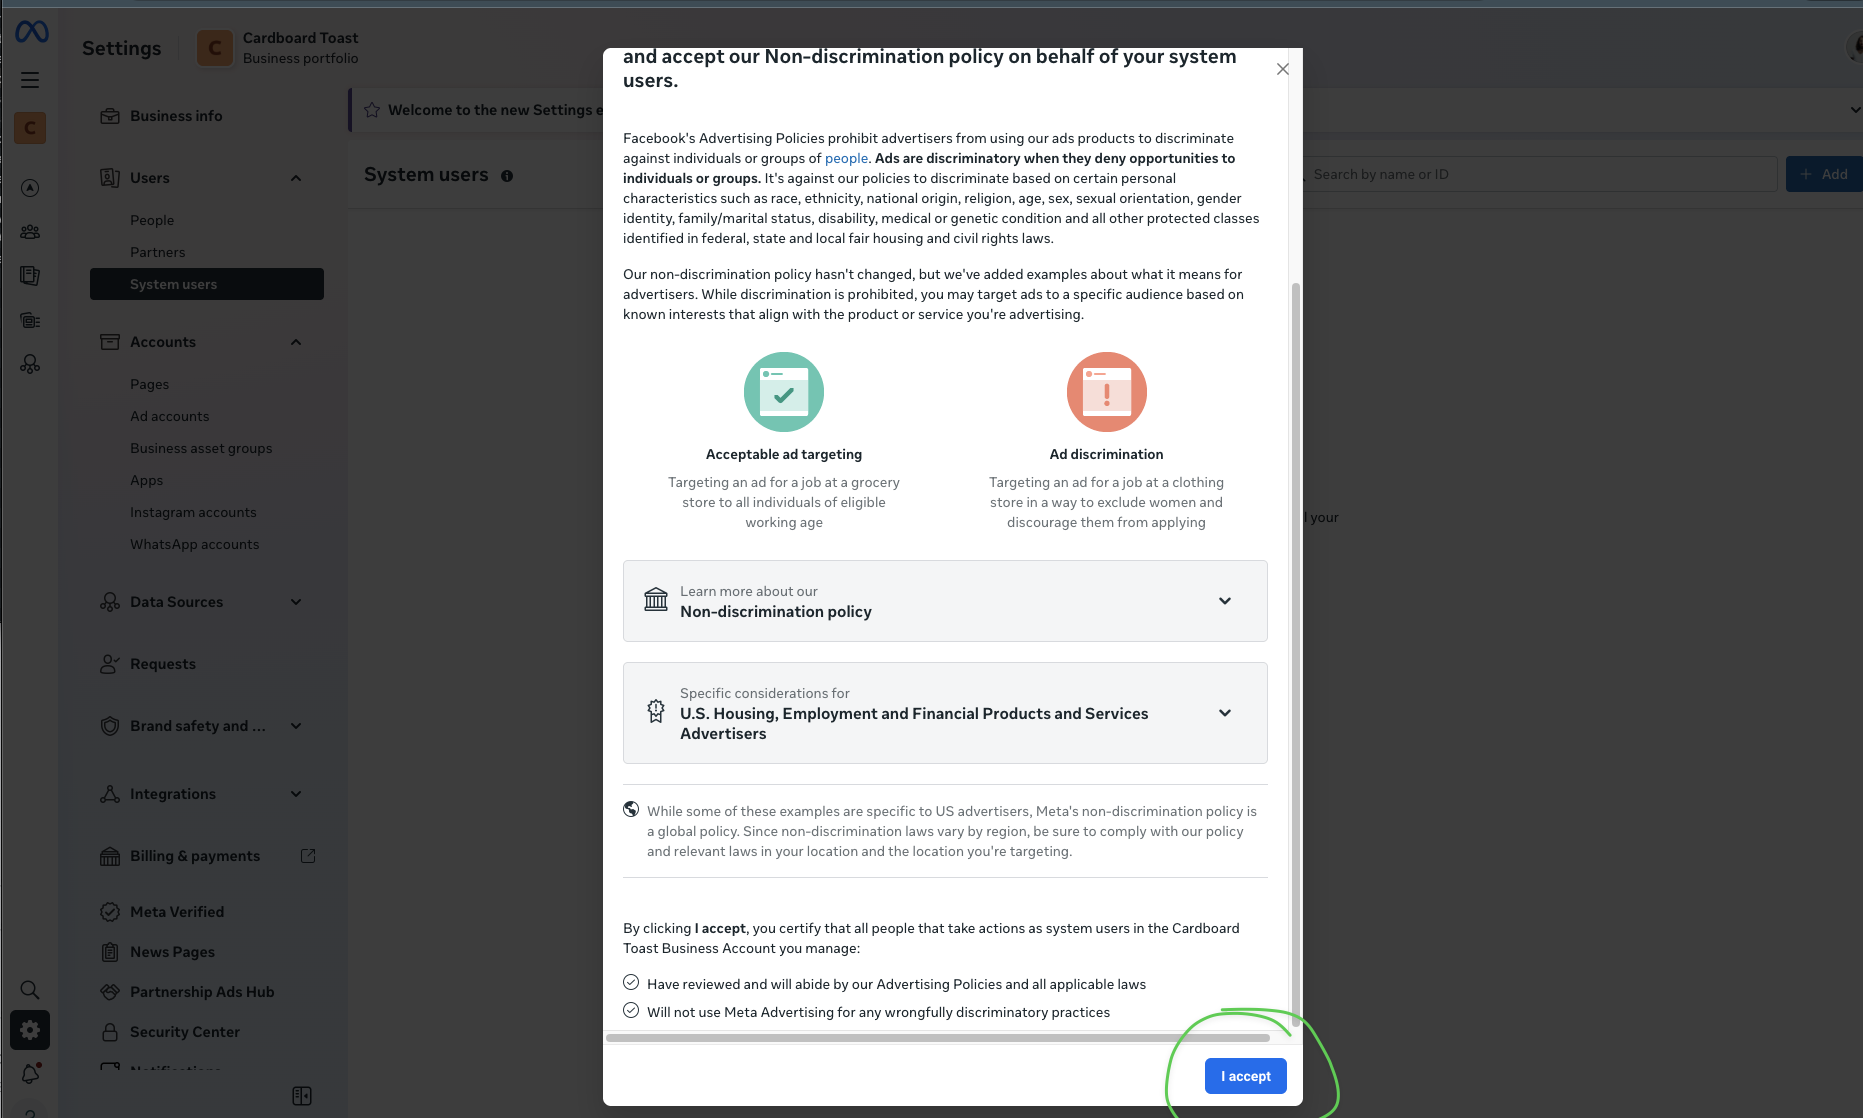
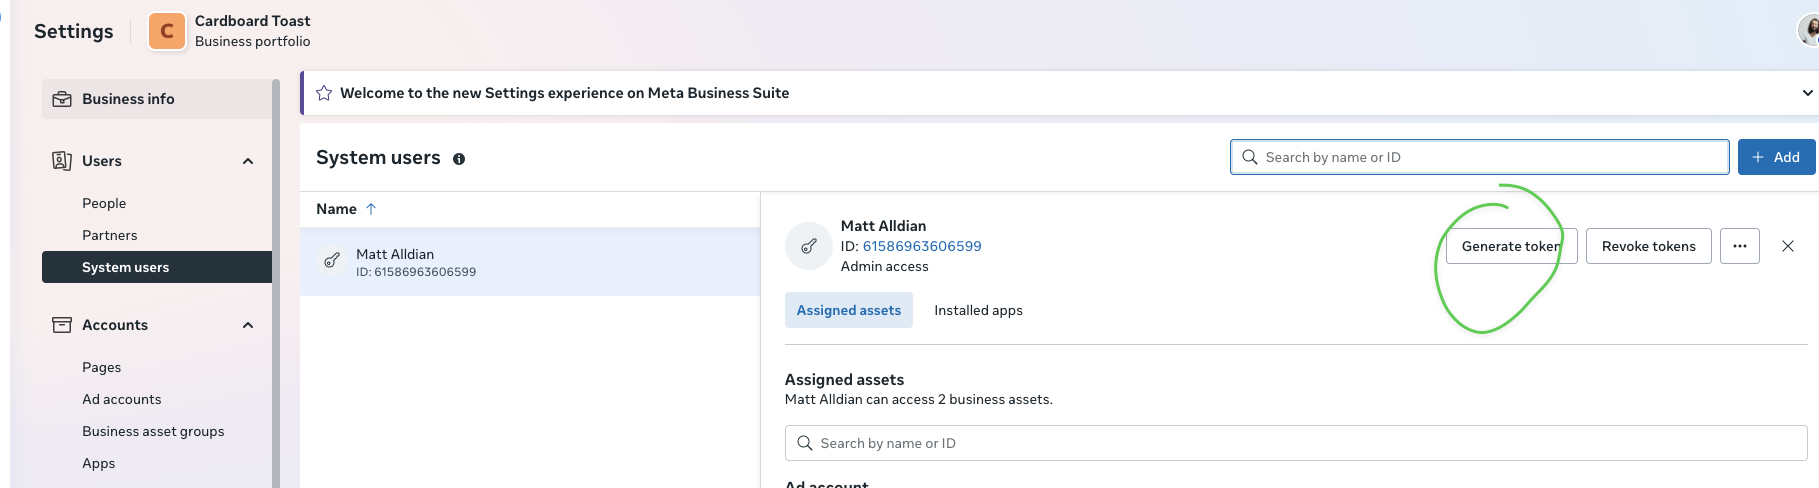
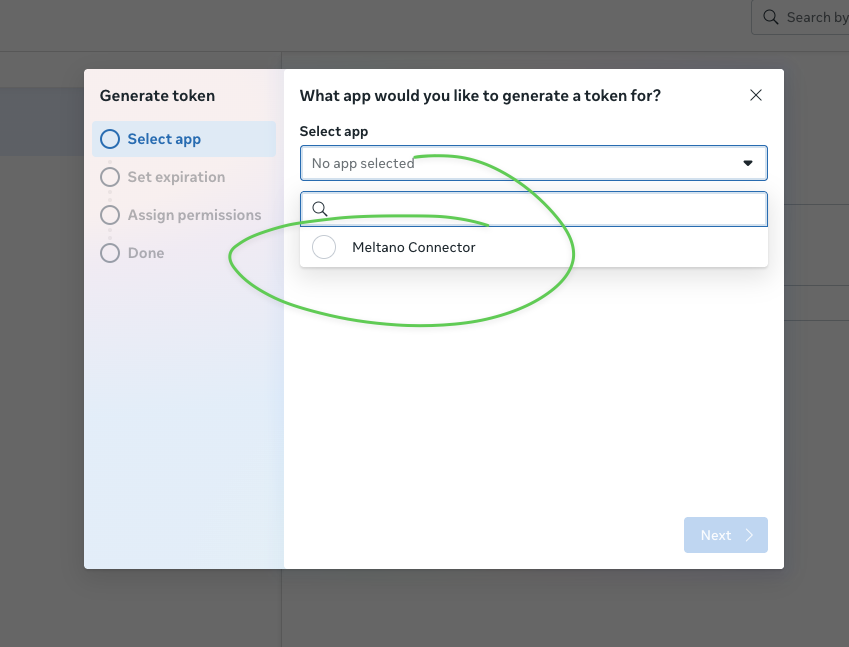
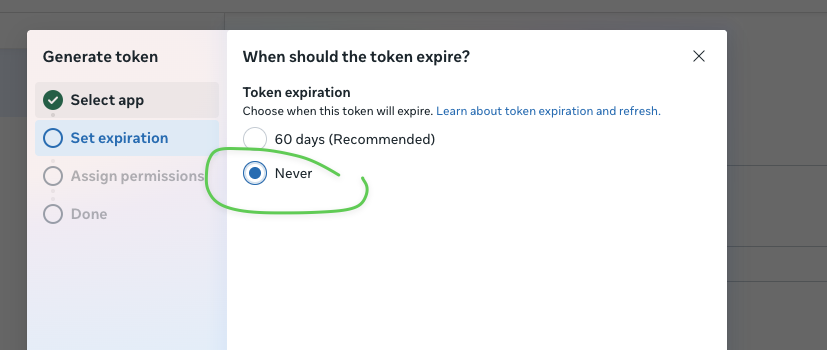
Create a Meta app and System User to read your ad account performance data.
Creates a Meta app and System User with READ-only permissions. We can view campaigns, ad sets, ads, and performance metrics—but we cannot modify your ad accounts.
GoodHelp Reporting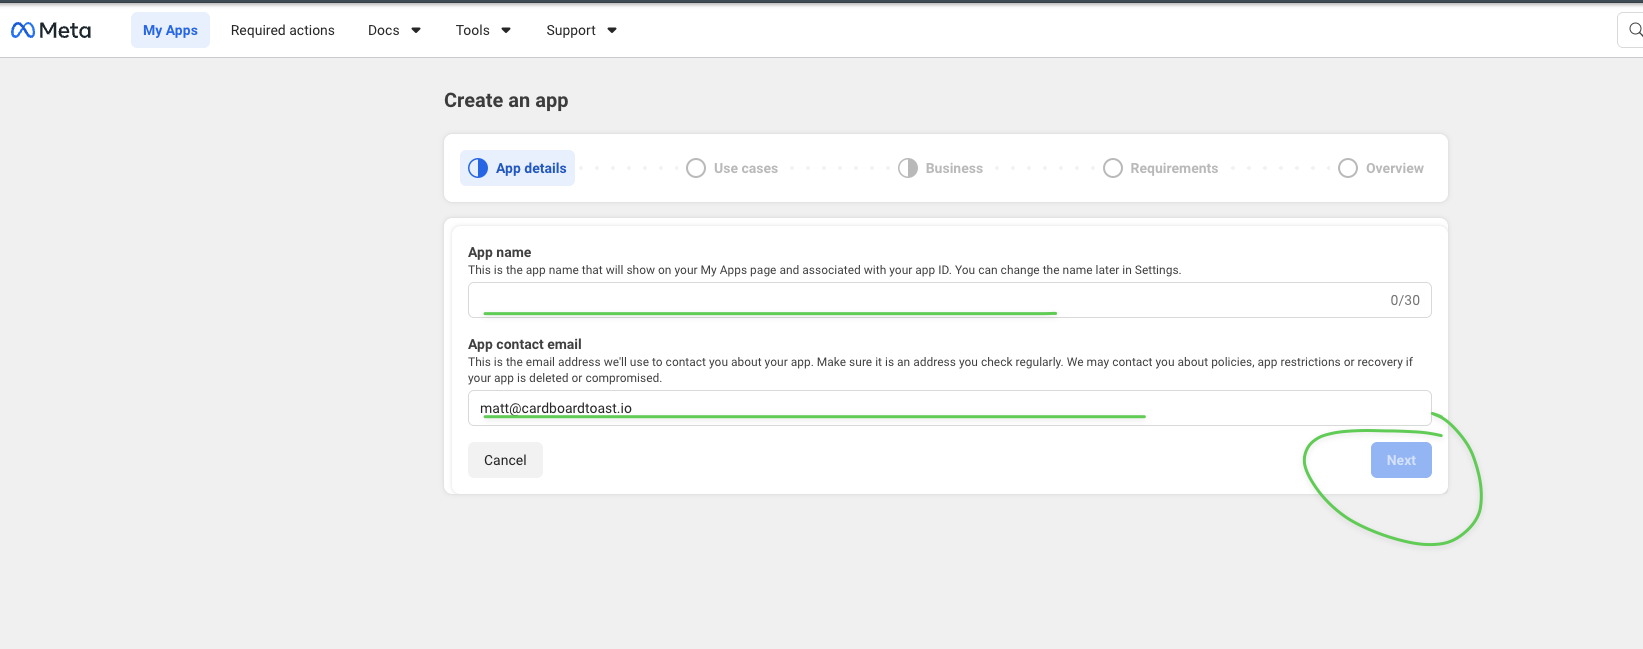
The App Secret should never be shared publicly or committed to version control.
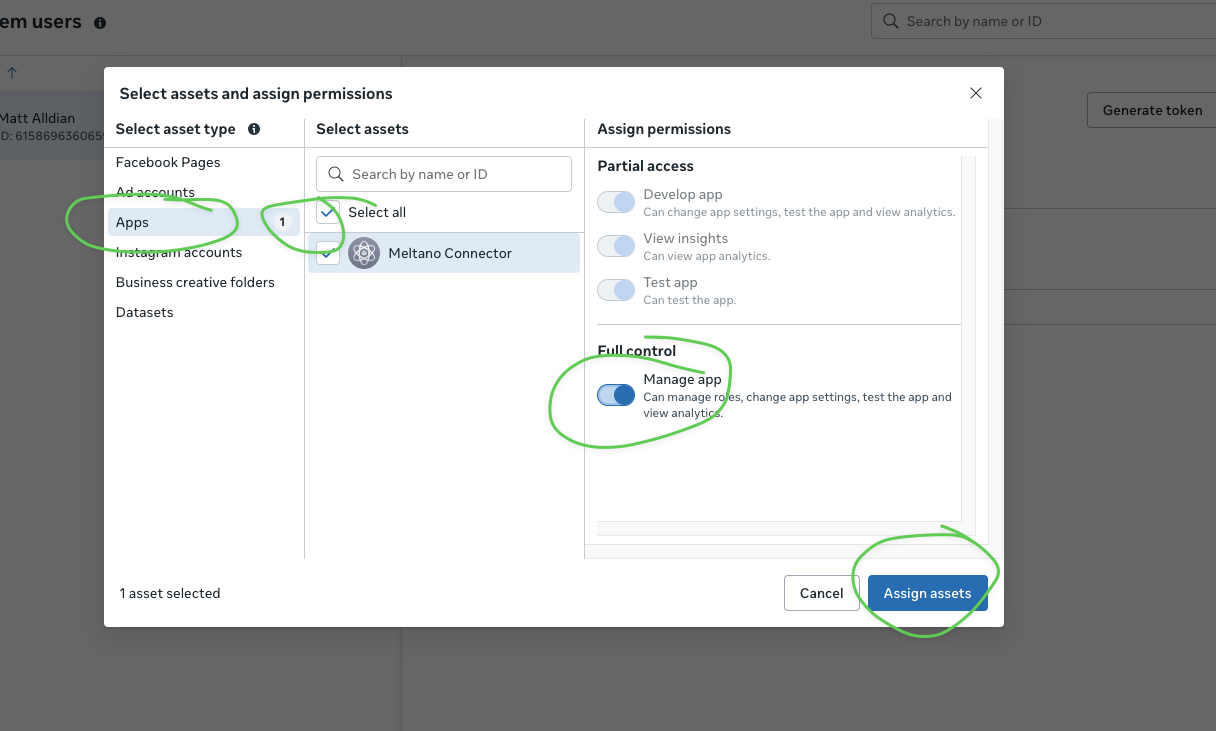
GoodHelp Reporting
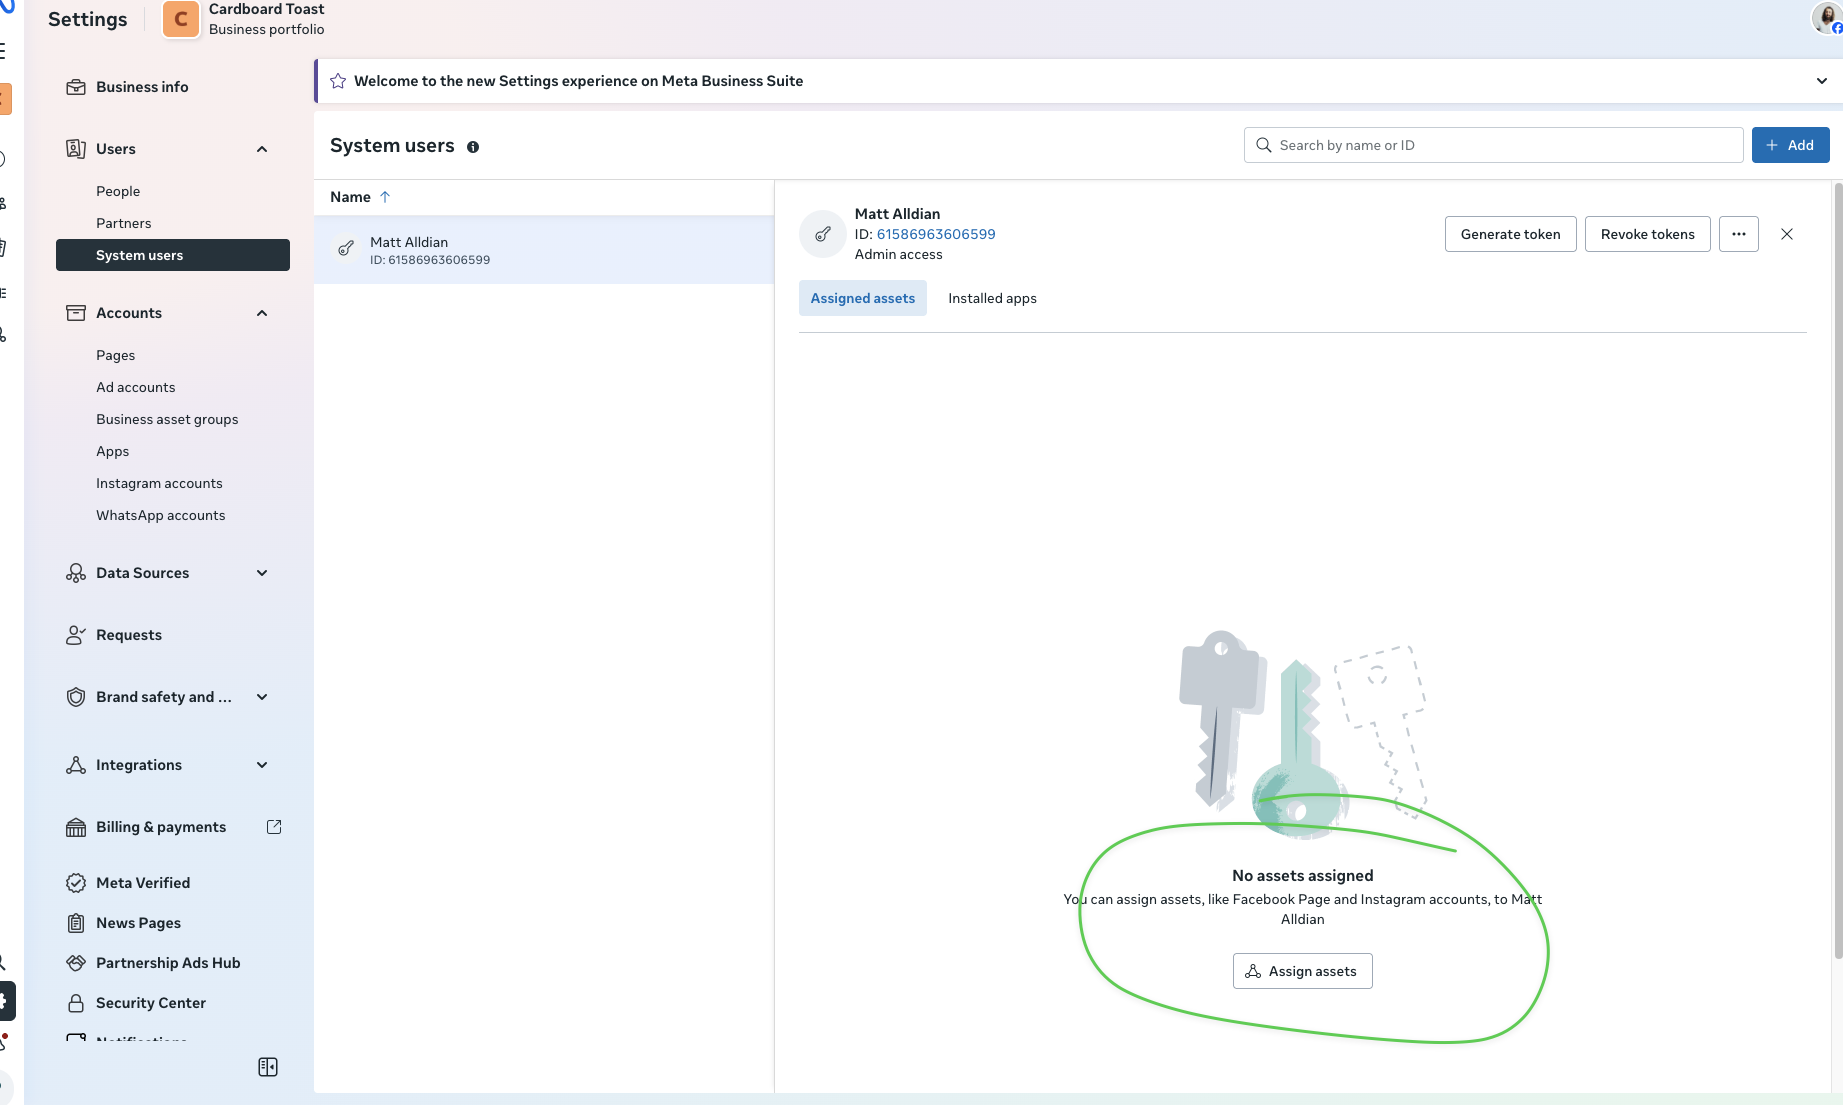
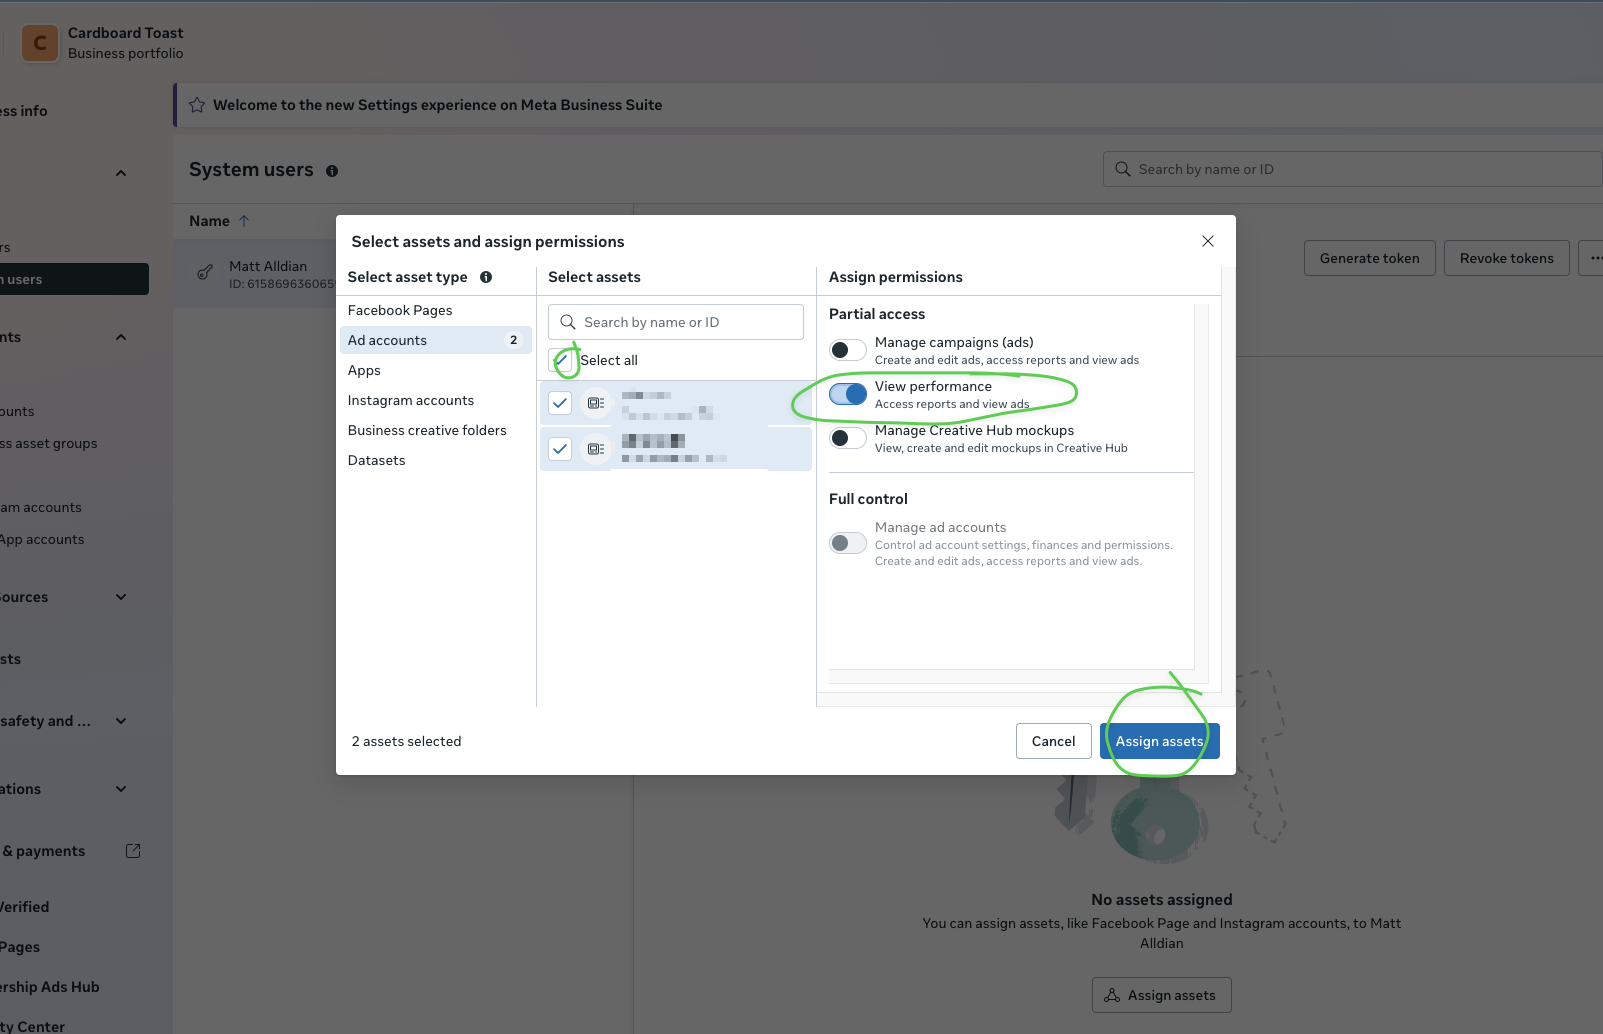
If you see "No permissions available", you need to also assign the App as an asset to the system user.
ads_managementads_readbusiness_management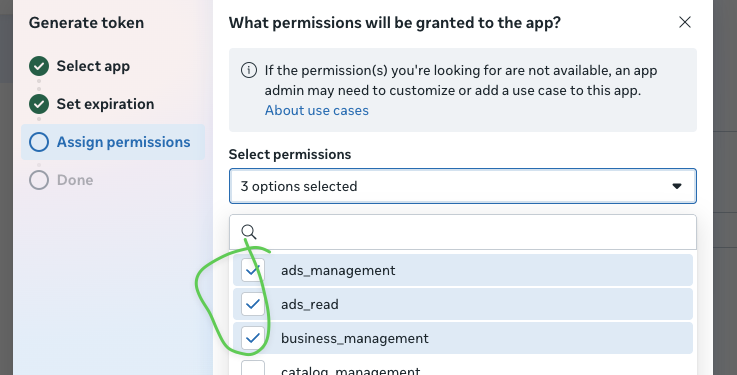
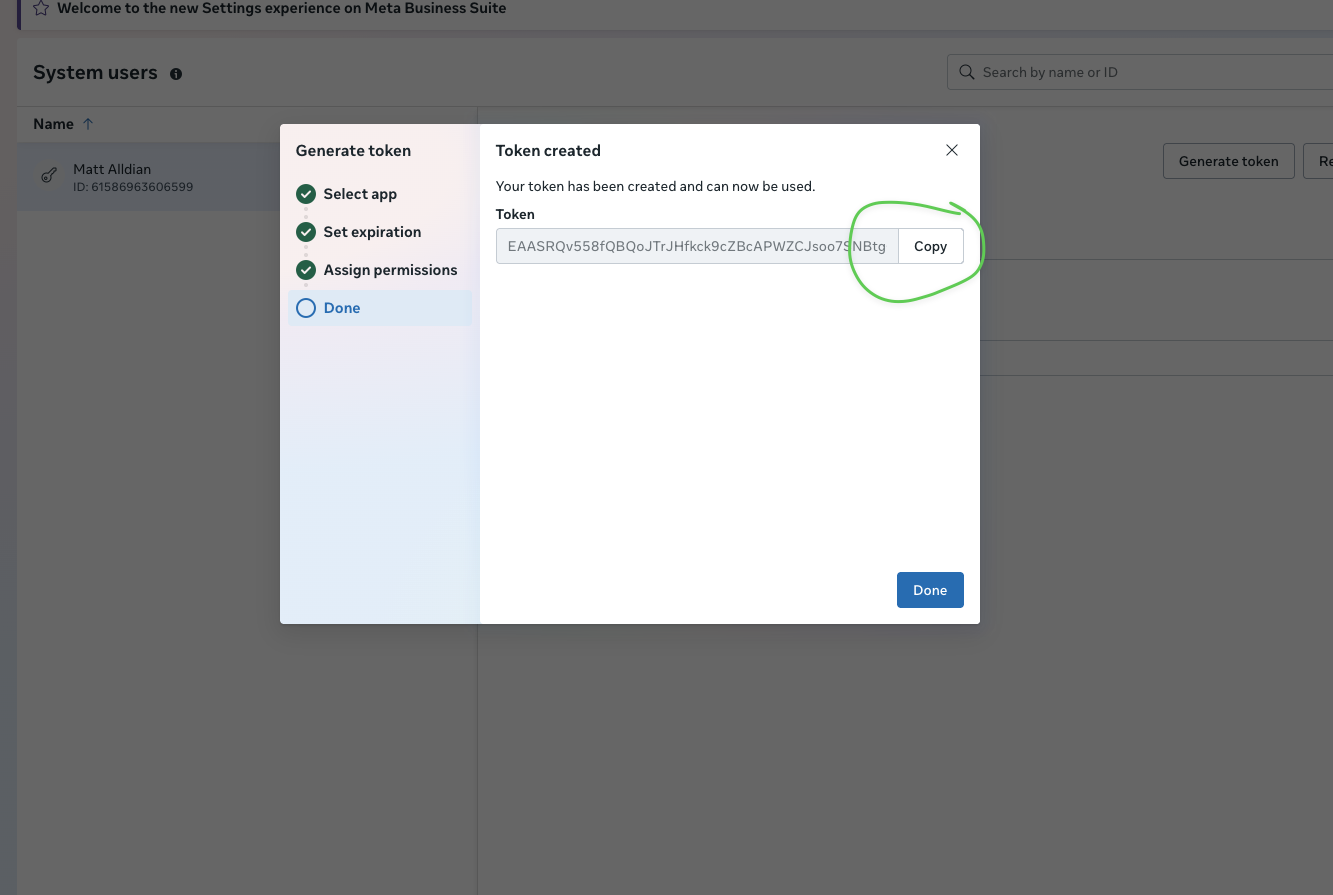
Copy the token immediately. You may not be able to see it again.
| What We Need | Where to Find It | Example |
|---|---|---|
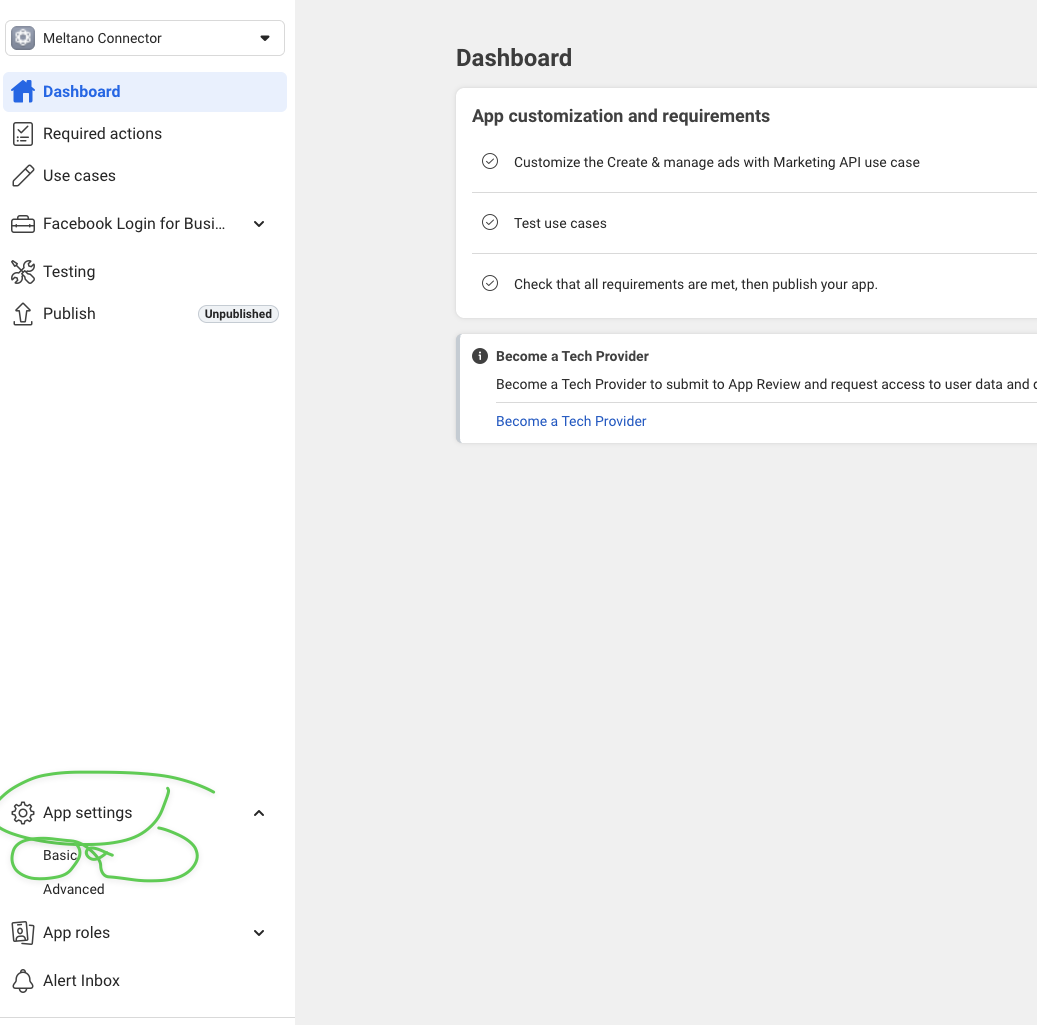
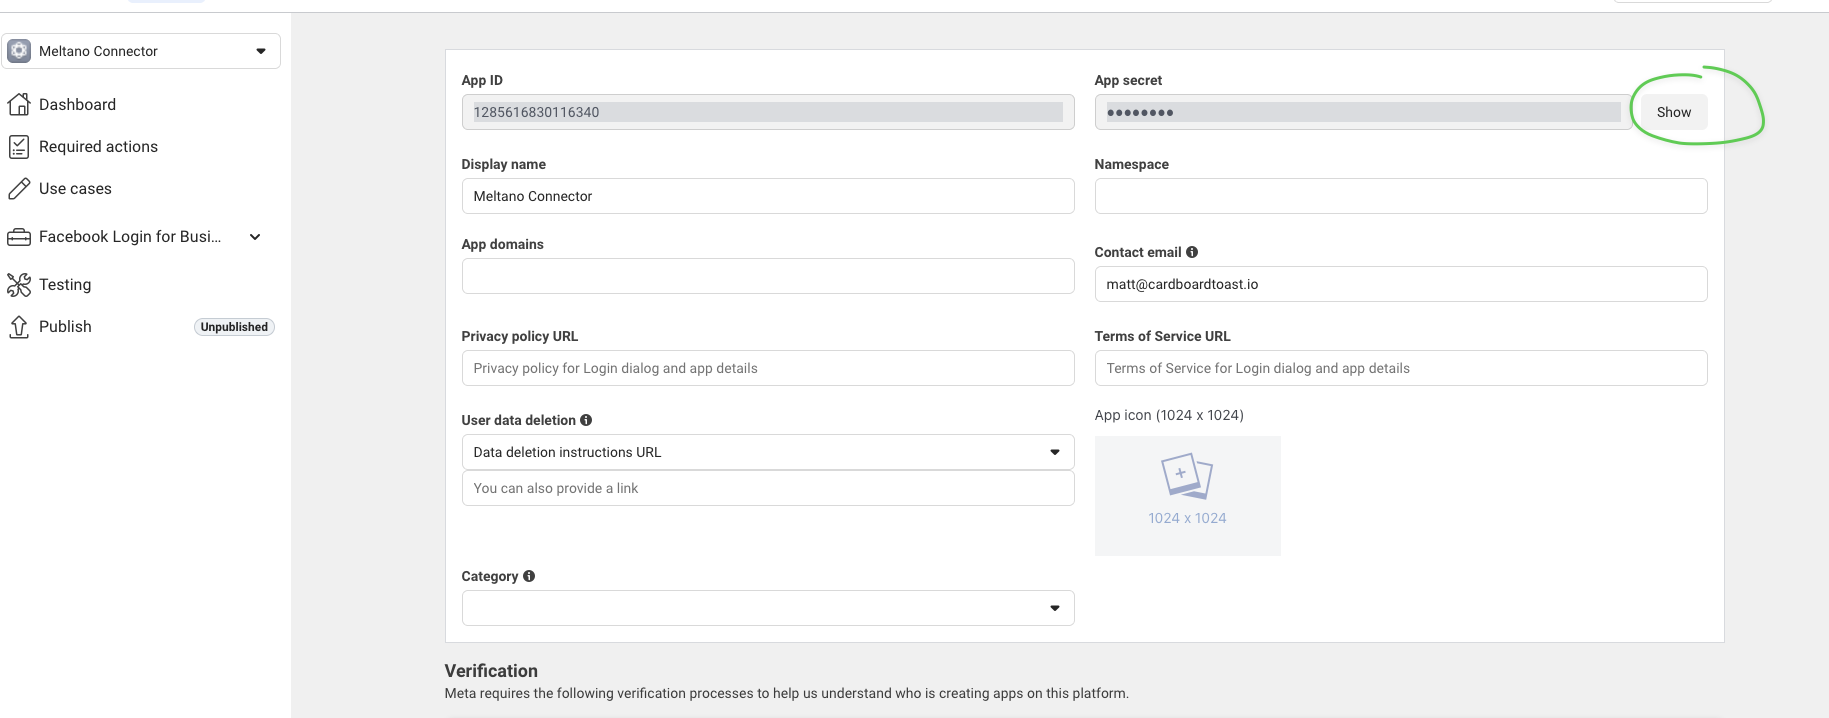
| App ID | App Settings → Basic | 1285616830116340 |
| App Secret | App Settings → Basic (click Show) | ea576f3fa40ee23be... |
| Access Token | From Step 7 above | EAASRQv558fQBQ... |
| Ad Account ID | Business Settings → Ad accounts | 177503112104493 |
Install the Happy Robots reporting bot to receive daily summaries and alerts in your Slack channels.
Installs a read-only reporting bot that posts daily summaries and alerts to your Slack channels. The bot cannot read your messages or access any data outside of what we explicitly send to it.


GoodHelp Reporting Bot


chat:write — Post messages to channelschat:write.public — Post to channels without joiningcommands — Add slash commandschannels:read — View basic channel info


Copy this token immediately and store it securely. You'll need to send this to Happy Robots.
xoxb-)


Repeat this for each channel where you want the bot to post reports.
For each channel where you added the bot, get the Channel ID:
https://workspace.slack.com/archives/C01ABCD2EFGC01ABCD2EFG part is the Channel ID
| What We Need | Where to Find It | Example |
|---|---|---|
| Bot User OAuth Token | OAuth & Permissions page | xoxb-1234-5678-AbCdEf... |
| Signing Secret | Basic Information → App Credentials | a1b2c3d4e5f6... |
| Channel IDs | Right-click channel → Copy link | C01ABCD2EFG |
| Workspace Name | Your Slack URL | goodhelp.slack.com |
The bot is read-only and cannot access your messages. It can only post to channels where you've invited it. You can remove it anytime from Slack Admin → Manage Apps.